BytesOfProgress
ESP32 Server Monitoring
13th January 2024 / 10:30 PM
To keep track if my servers are turned on and connected to my network, I needed a device with a small display, which pings the local IPv4 addresses, and shows the state on the display.
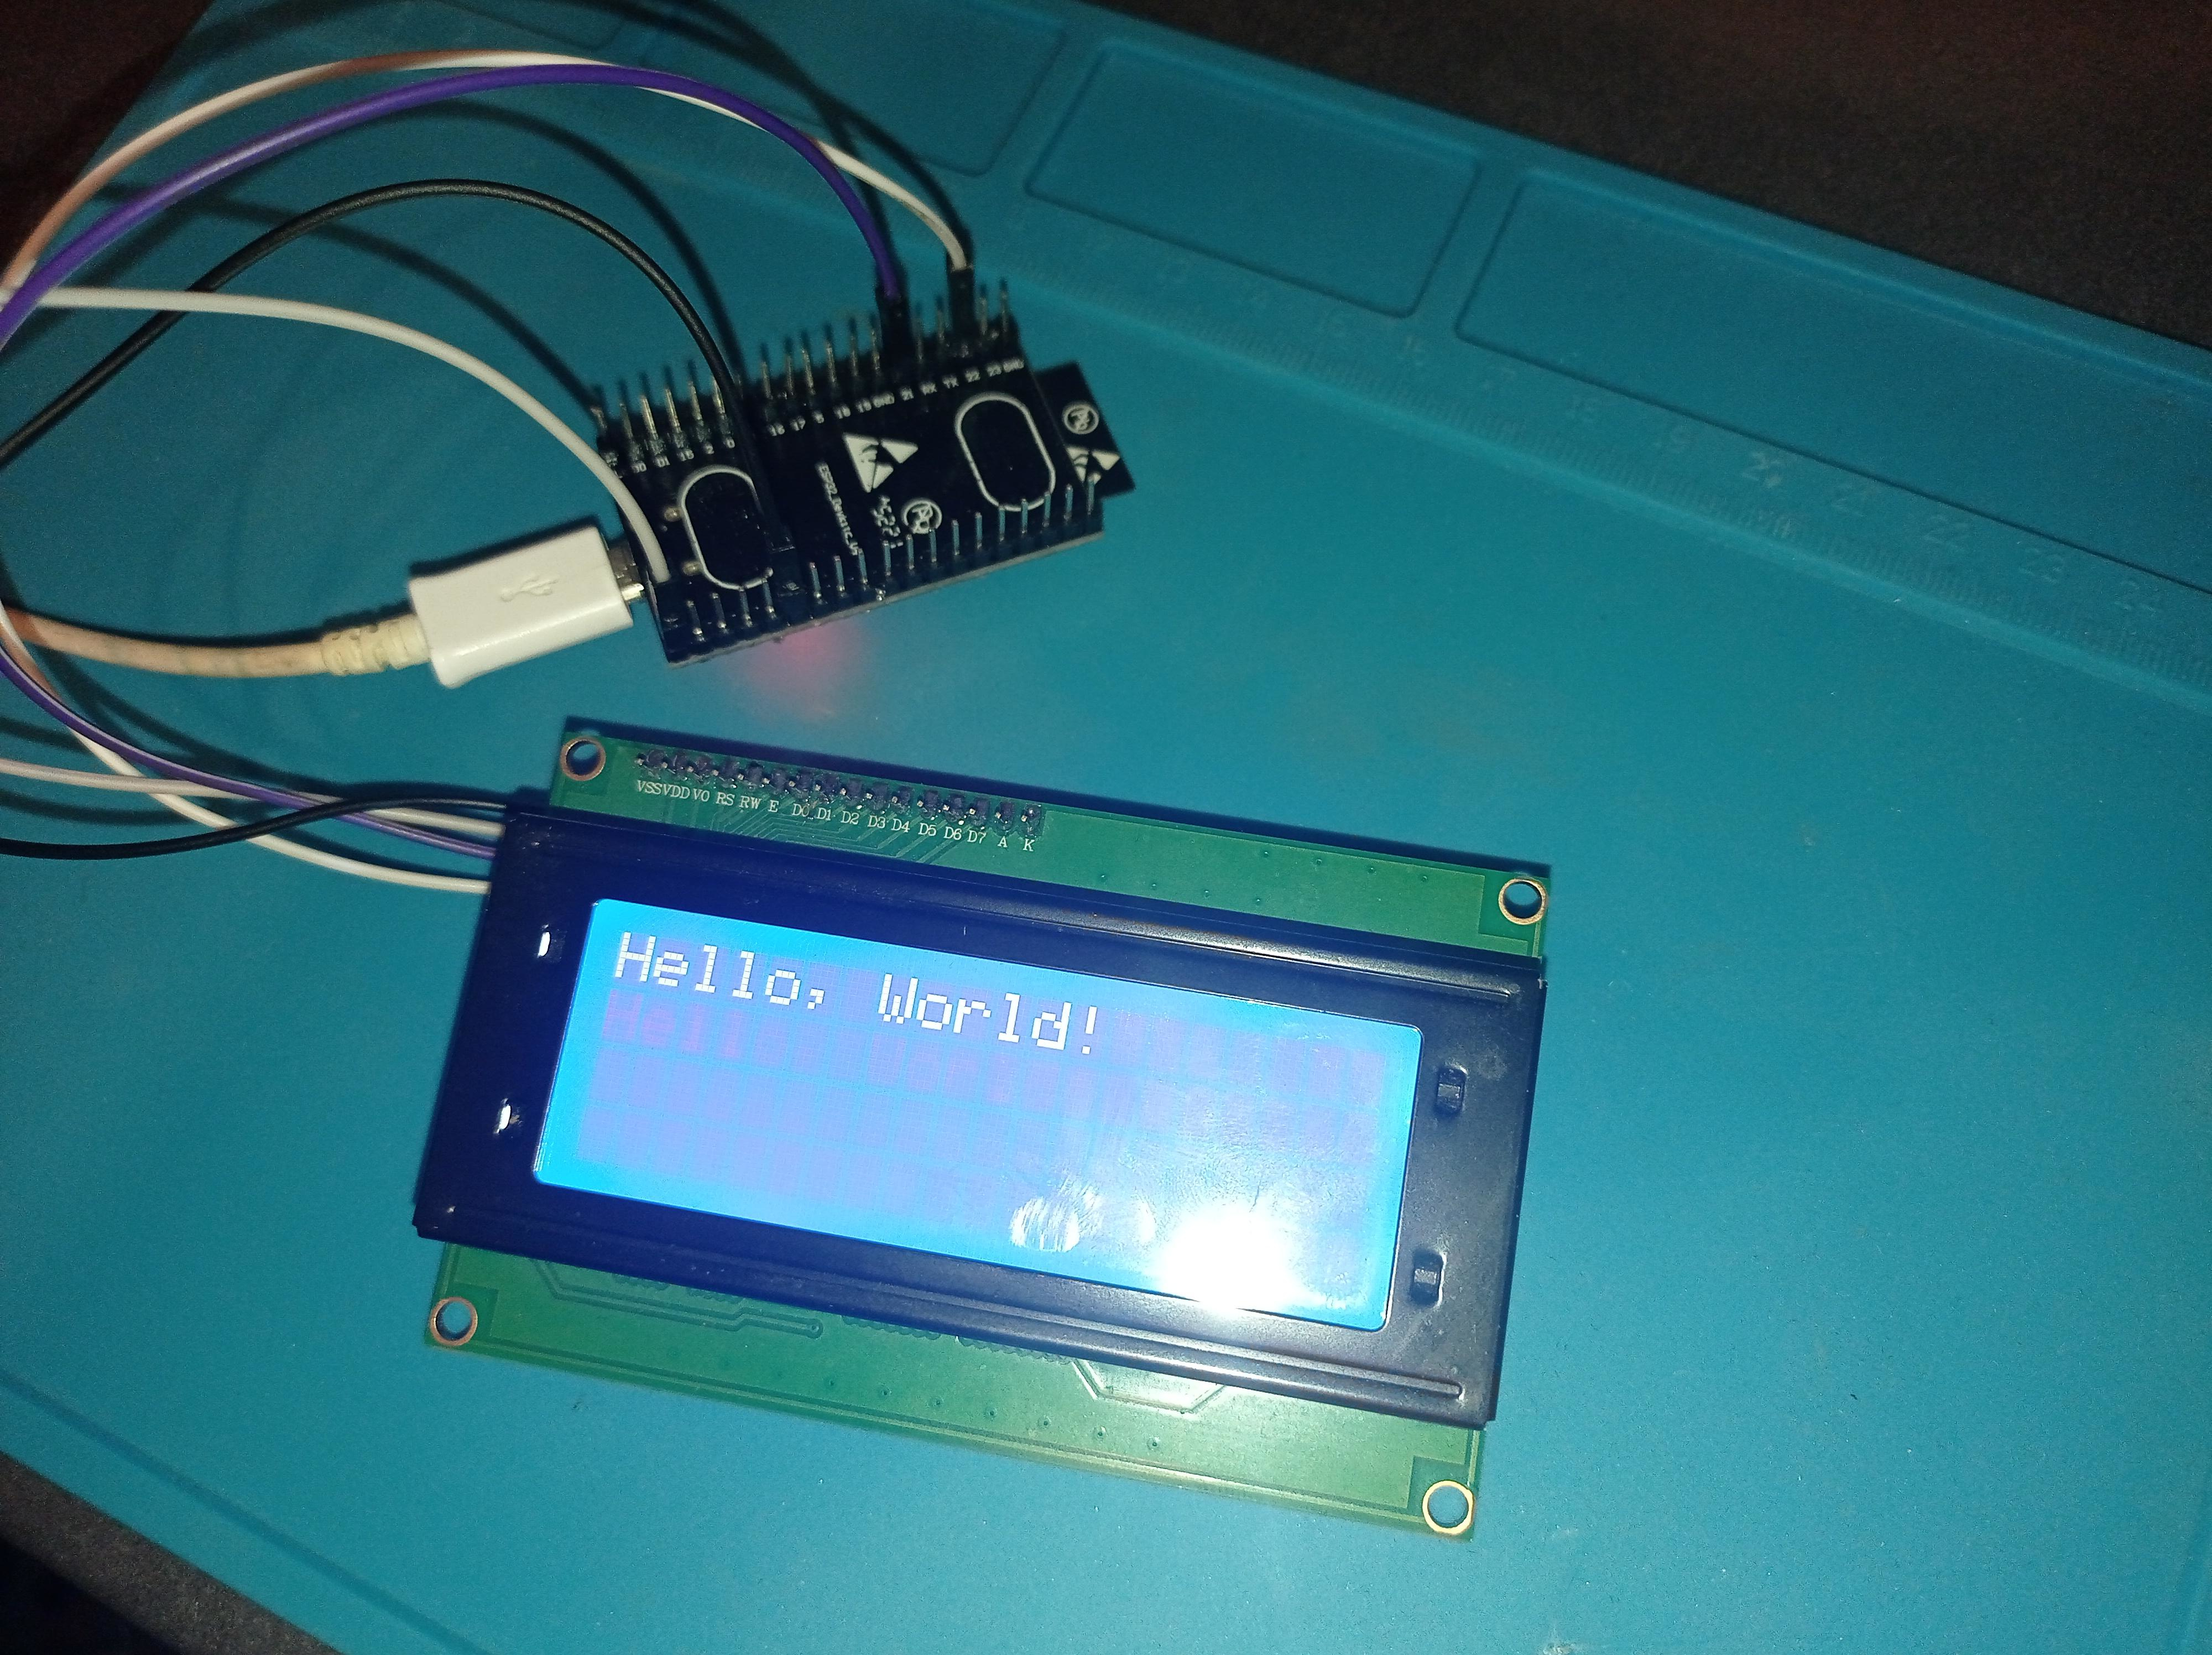
For that, I decided to go with an ESP32 and a 4 / 20 I2C display. I started by connecting the ESP32 to my network with WiFi. After that, I connected the I2C display to the ESP32 and ran the first obligatory "Hello, World!".
Then I needed the ESP32 to ping all my servers once within every time it runs through the loop. For that I used the ESP32Ping library. Now the display needed to show the result of the ping.
Since I run multiple servers, the display needs to switch back and forth between the servers. It will display the state of the next server every 5 seconds.
I also wanted another indicator: LEDs. Whenever a server is offline, a red LED will turn on. To achieve this, I soldered the LED to a cable with a 47Ω (Ohm) resistor and attached it to pin 18 of the ESP32.
  // Libraries
  #include <WiFi.h>
  #include <Wire.h>
  #include <LiquidCrystal_I2C.h>
  #include <ESP32Ping.h>

  // WiFi access
  const char* ssid = "SSID";
  const char* password = "WPA2_PASS";

  // Setting LED pin
  const int ledPin = 18;

  // Display data
  LiquidCrystal_I2C lcd(0x27,20,4);

  void setup()
  {

  // Setting pinMode
  pinMode(ledPin, OUTPUT);

  lcd.init();
  lcd.backlight();

  Serial.begin(115200);

  WiFi.mode(WIFI_STA);
  WiFi.begin(ssid, password);
  Serial.println("\nConnecting to WiFi Network ..");

  while(WiFi.status() != WL_CONNECTED){
      Serial.print(".");
      lcd.setCursor(1, 1);
      lcd.print("CONNECTION FAILED!");
      digitalWrite(ledPin, HIGH);
      delay(100);
  }
      lcd.clear();
      Serial.println("\nConnected to the WiFi network");
      Serial.print("Local IP: ");
      Serial.println(WiFi.localIP());

      digitalWrite(ledPin, HIGH);
      delay(500);
      digitalWrite(ledPin, LOW);
  }

  void loop()
  {

  //-------------------------------------------------------------------
  // HomeLab Panel

  bool panel = Ping.ping("IP", 1);

  lcd.setCursor(4, 1);
  lcd.print("HomeLab Panel");

  if(!panel){
      lcd.setCursor(6, 2);
      lcd.print("OFFLINE!");
      digitalWrite(ledPin, HIGH);
      delay(5000);
    digitalWrite(ledPin, LOW);
      lcd.clear();
  }
  else{
  lcd.setCursor(7, 2);
  lcd.print("ONLINE");
  delay(5000);
  lcd.clear();
  }

  //-------------------------------------------------------------------
  // BytesOfProgress

  bool BOP = Ping.ping("IP", 1);

  lcd.setCursor(3, 1);
  lcd.print("BytesOfProgress");

  if(!BOP){
      lcd.setCursor(6, 2);
      lcd.print("OFFLINE!");
      digitalWrite(ledPin, HIGH);
      delay(5000);
      digitalWrite(ledPin, LOW);
      lcd.clear();
  }
  else{
  lcd.setCursor(7, 2);
  lcd.print("ONLINE");
  delay(5000);
  lcd.clear();
      }
  }
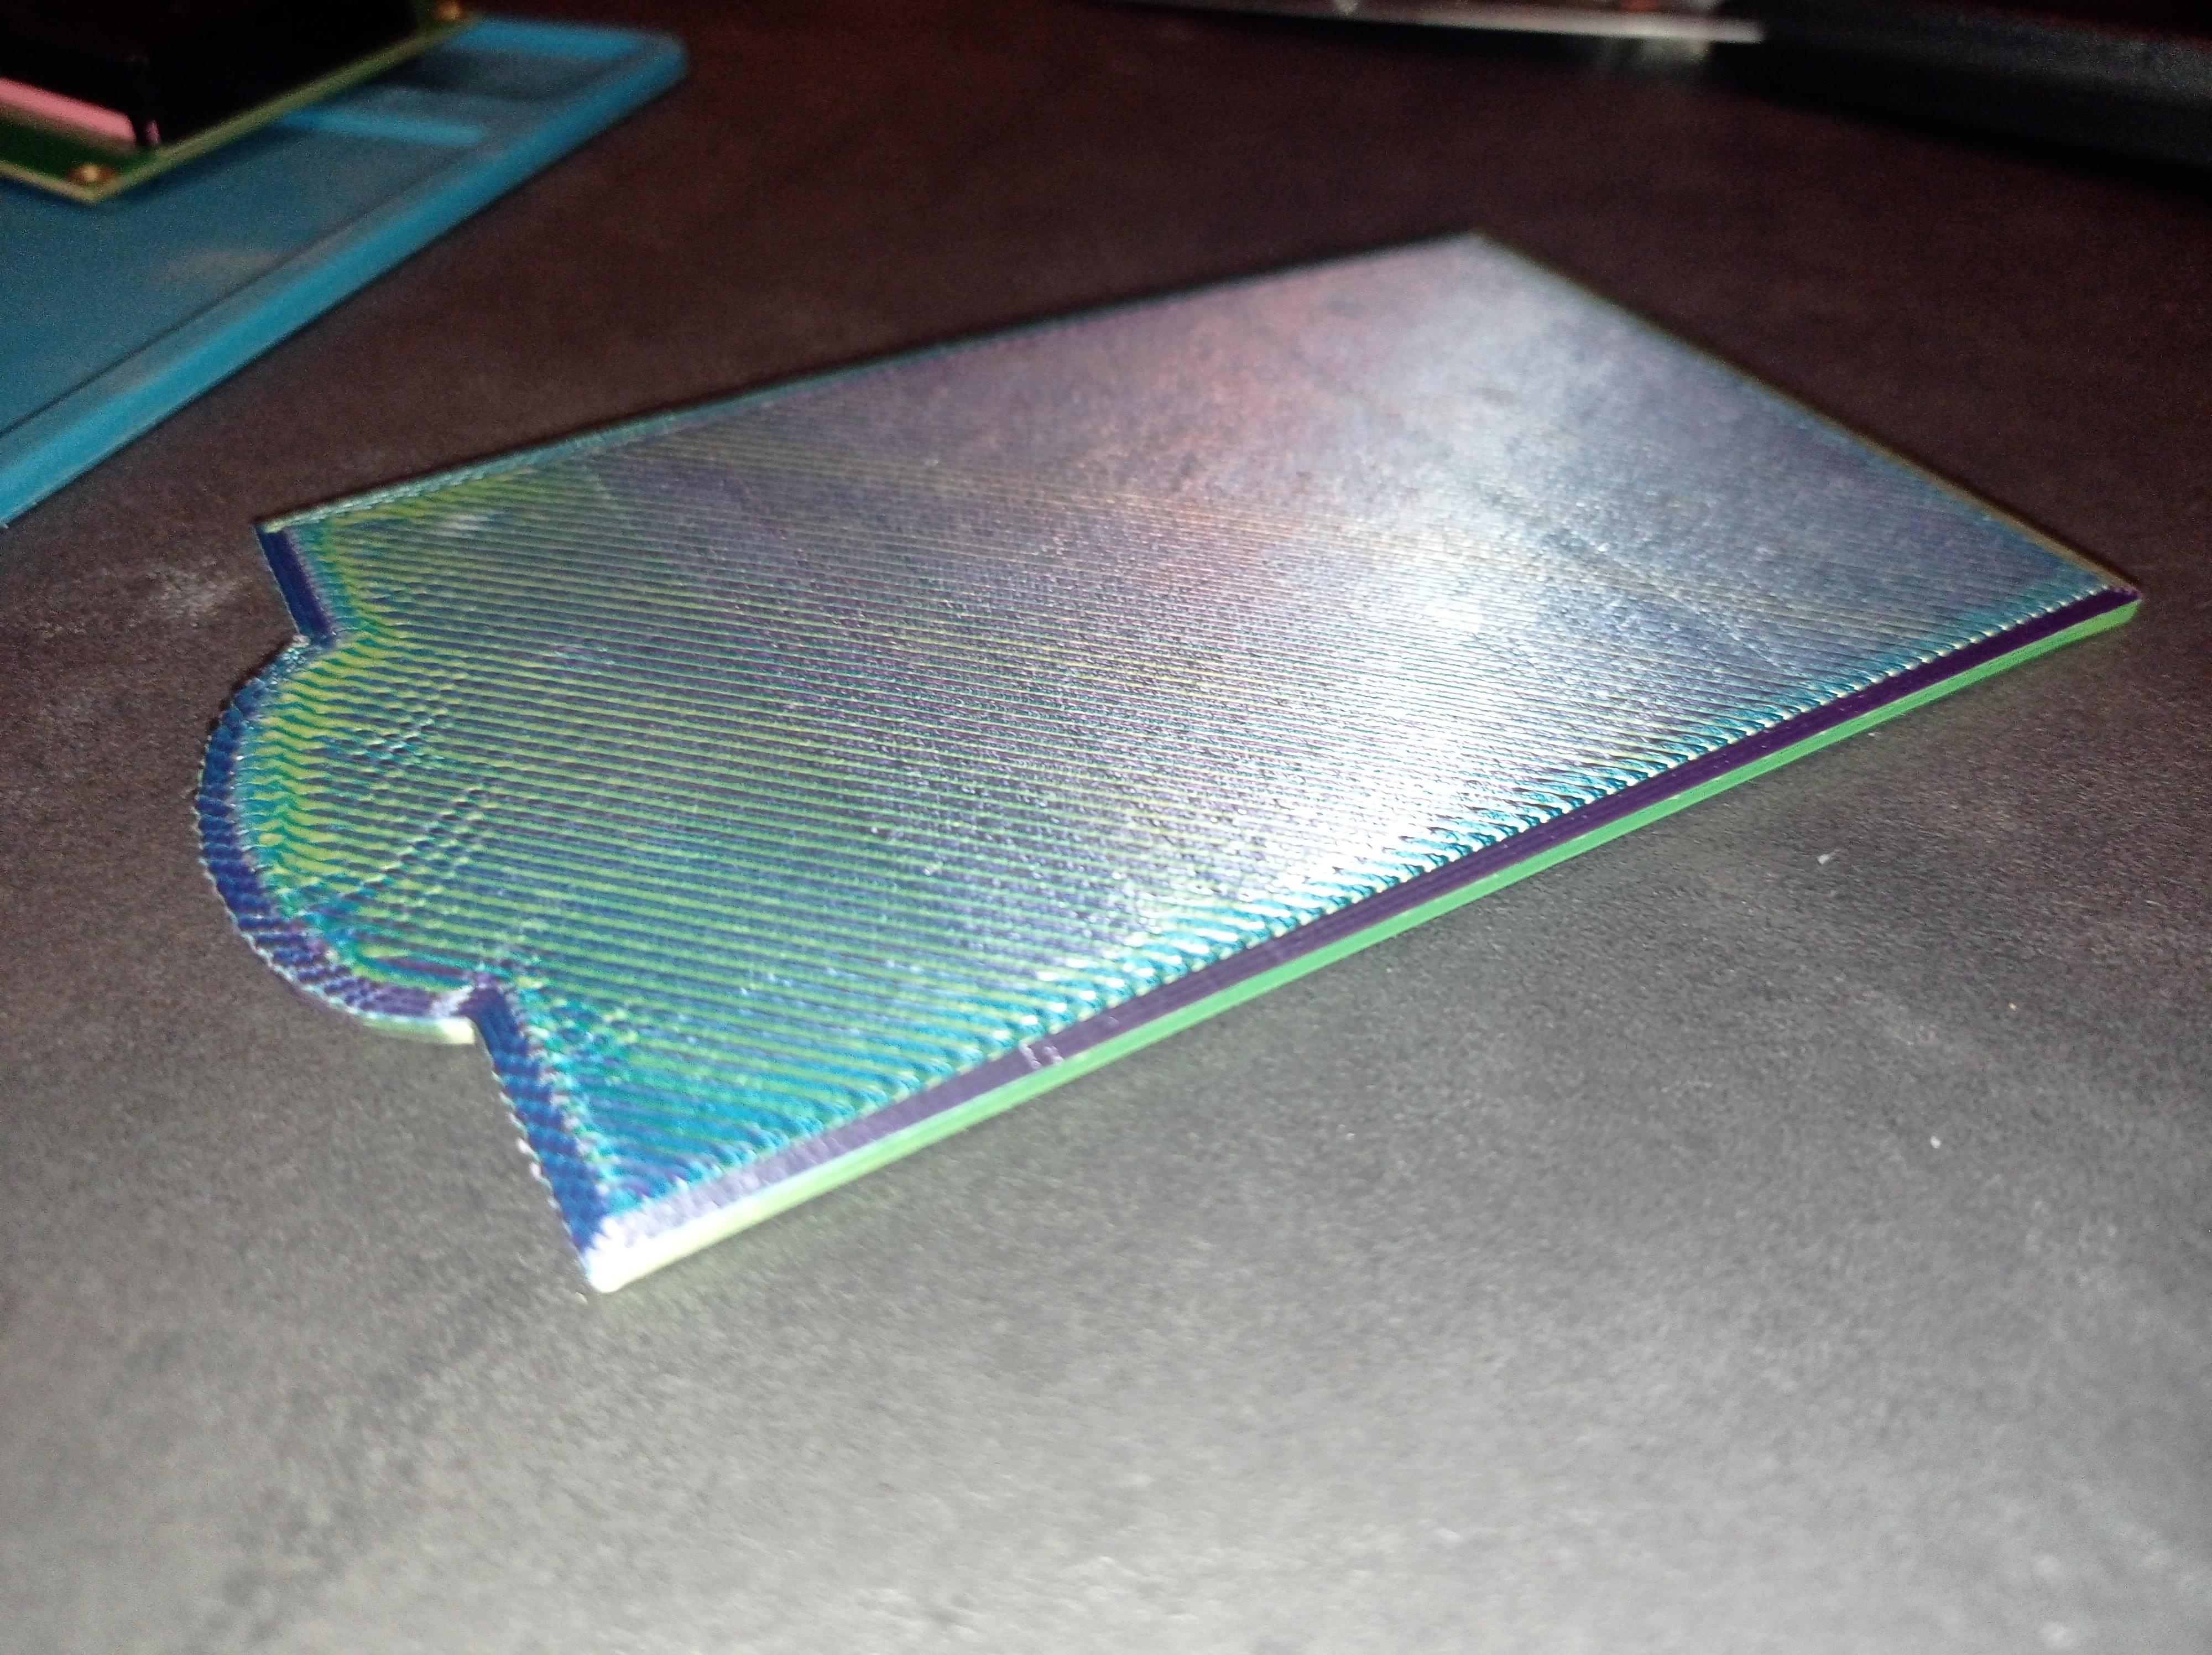
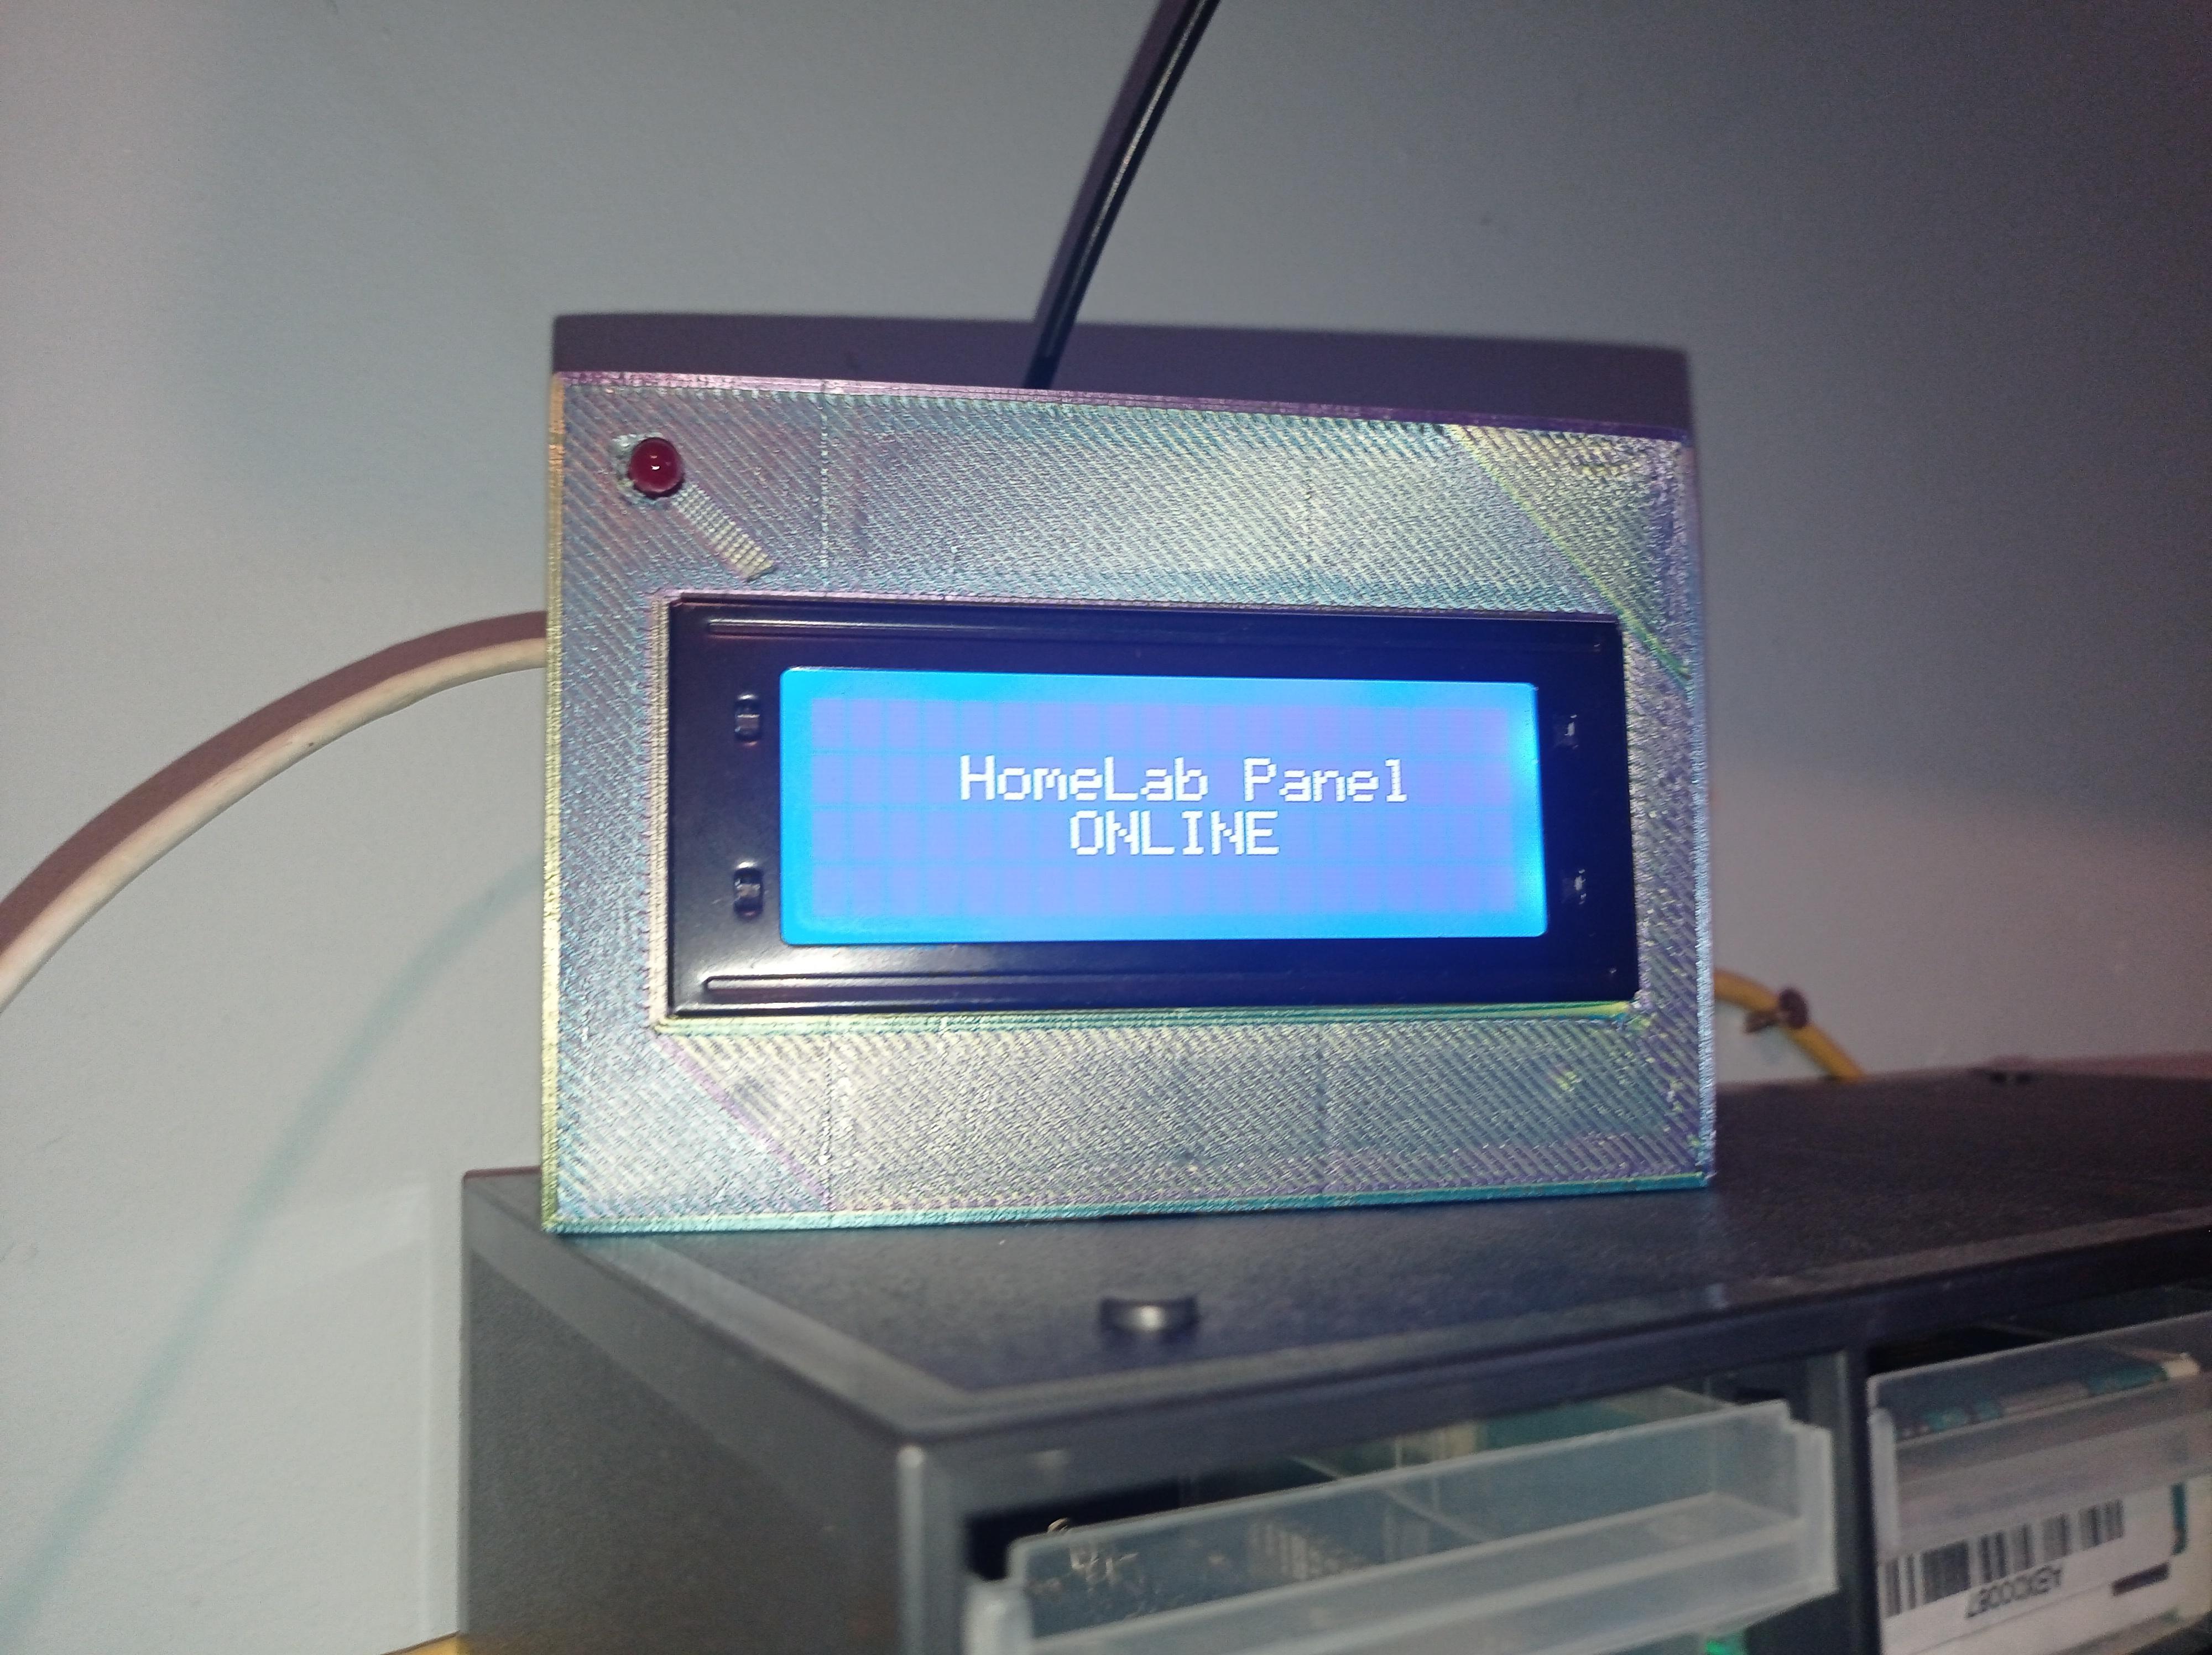
Now I needed a case to hold all this in place. I repurposed a case I constructed with TinkerCAD before, so I can not show the process of creating this.
Download STL's
First I 3D-Printed the lid of the case:
Then it was time to 3D-Print the case itself and assemble all of it inside the case.
back